SusanSalutations

Thursday, May 04, 2023

The New Annual Catalogue for 2023 and 2024 is LIVE!

It's an exciting time of the year right now as the new Stampin' Up! Annual Catalogue goes live! We have new stamps, dies, tool enhancements, cardstock, designer series paper, bling, ribbon....new In Colours too!


<a href="https://issuu.com/stampinup/docs/ac24_en_au?fr=xKAE9_zU1NQ" target="_blank"><img src="https://i.imgur.com/05gUS7V.jpeg" width="150" height="195" alt="Stampin' Up! Annual Catalogue" /></a>


Stampin' Up! does an incredible job keeping us up to date and on point with colour, don't you think? As you look around the stores and fashions of today, you will notice these new colours everywhere, alone or in combination.

Wow, Stampin' Up! 

If you live in Australia and would like to find out how you can receive a free new annual Ideas Book and Catalogue from me contact me in the comments or, if you want to order a new Catalogue, go to my SusanSalutations online store where you can add one to your order or purchase one outright :)

Tuesday, April 18, 2023

Free Postage on $65+ Orders on April 19th 2023!

 It's too good a special to miss out on! Not only do you get free postage on $65+ orders, you have the opportunity to also

  1. Shop discounted items not continuing into the new catalogue
  2. Shop heavily discounted Clearance Rack items
  3. Have a look at the Online Exclusive products on offer!
  4. If you order from me, I will send you a new Annual Catalogue, valued at $7, for free! AND
  5. I'll invite you to join my exclusive Facebook Group  made just for customers and members of my team :)

Let me know if you need help with ordering. You can order from me here..

PS: I am in Australia, so you can only order from me if you live here.  If you live in another country and have a Stampin' Up! Demonstrator there, contact them quickly to place an order with them!


Free Shipping 19.4.23


Friday, August 26, 2022

Hair for the Ponytail Project

Warning: This is a post that doesn't have a lot to do with paper crafting. It's a bit more personal for me.I wanted to share with you though. And it might be related to papercrafting if you read to the end...

You may have noticed I updated my Avatar pic from this to that:


That's because I had 58cm of my hair cut off to give away to a wig making organisation that supports people undergoing chemo and radiation or who have scalp conditions like Alopecia .

I chose the Ponytail Project to donate my hair. They tell you all the details of how to send your hair to them on their page.

Ponytail Project


A huge thanks to Janelle, my hairdresser at the Hair Salon in our Village.She was wonderful about helping me with this. She divided my hair into six ponytails, then plaited and cut off each one individually.She said it was a 'first' for her, too!

I hope someone benefits and it makes a difference to their life!

You know, I don't scrapbook much. This is an event I might think about creating a page for though. What do you think? It seemed like a big deal at the time! I know it sure feels and looks different to go from having very long hair to almost a Pixie cut in an afternoon!

What similar things have you done to make a difference for someone else? Tell me in the comments :)

Card Ideas - Pop Up Cards

 It's fun to try something new with cardmaking, right?

I found out that pop up cards were not so hard! 

It had been years since I tried a card like this. I forgot that all you have to do is create a little pop out section in your card base to glue things to. 

That's r this Cup of Tea card. I scored and cut a couple of little sections into my card base and made them fold the opposite direction to what they would usually do.

Then I decorated to my heart's content!

Pop Up Card


I thought the Cup of Tea stamp set and dies would make a great pip up card, so for this card, I  scored  lines out from the centre fold at the 1" (2cm) mark. Then I cut at right angles out to that mark. I didn't score all the way across the card, just along an inch (2cm) where I wanted my platforms to be.

Once you create your scores you cut at right angles form the centre score line to the 1" (2cm) mark.

After the cuts are made, you push the cut section towards you. It pops out like a little box step.


Pop Up Card

After that, you just create your pop up elements so they can be glued to the face of the pop out step!


Pop Up Card

DESIGN HINT: When getting ready to glue your pop up elements to the step, close your card on it completely to make sure your card folds flat AND to make sure your decorative elements don't shoot out too far from the closed card. 

You might have trouble getting your creation into an envelope otherwise, or would wind up having to make a very large card base!


Pop Up Card


I hope you enjoyed seeing this project!

You can purchase the supplies I chose from my SusanSalutations Store. This is the link to the entire Tea Boutique Suite. You can pick and choose what you want from it individually, but the Suite price is discounted. :) 

I chose my col
ours from the DSP. I like to do that as it makes colour selection so easy. I just know I will have a well coordinated card when I do that!

Sit a bit and enjoy a cuppa while you create cards and more with products from the Tea Boutique Suite Collection.

This suite collection has what you need to create tea for two (or more): stamps for stamping teacups, tea bags, and sentiments; patterned paper with teapots, teacups, and florals; dies to cut out stamped images or accent pieces; and coordinating cards and envelopes. Make a card or two and send them away to brighten someone’s day!

The Tea Boutique Suite Collection includes:

CUP OF TEA STAMP SET (10% OFF)
* 20 photopolymer stamps
* Suggested clear blocks (sold separately): a, b, d, g

TEACUP DIES (10% OFF)
* 17 dies
* Largest die: 2-1/4" x 1-1/2" (5.7 x 3.8 cm)
* Use with a Stampin’ Cut & Emboss Machine
* Compatible with the Mini Stampin’ Cut & Emboss Machine

TEA BOUTIQUE 6" X 6" (15.2 X 15.2 CM) DESIGNER SERIES PAPER
* 48 sheets of patterned paper: 4 each of 12 double-sided designs
* Acid free
* Lignin free

TEA BOUTIQUE CARDS & ENVELOPES
* 20 card bases and 20 envelopes
* Folded card size: 4-1/4" x 5-1/2" (10.8 x 14 cm)
* Acid free
* Lignin free

Product colours: Crumb Cake, Crushed Curry, Fresh Freesia, Orchid Oasis, Parakeet Party, Petal Pink, Starry Sky, Sweet Sorbet, Tahitian Tide.

Add ink, cardstock, and adhesive to complete your projects.
Tea Boutique Suite


Wednesday, August 24, 2022

End of Sale A Bration is August 31st, 2022

 Hi everyone. Sale-A-Bration is coming to a close for 2022. The next one won't happen till 2023!

At the moment for every $AUD90 product order you place, you can earn a free Level 1 reward.

For every $AUD180 product order you place, you can earn a Level 2 reward.

As some of the rewards listed in the Sale-A-Bration brochure have been depleted, Stampin' Up! has released more products to fill the gaps! You can see the current list of rewards on my SusanSalutations shopping pages.

Remember to browse your Seasonal Catalogue (free to all my customers who have placed an order with me this year) for all kinds of ideas about Christmas, Thanksgiving, Hallowe'en, birthdays etc - use your catalogue as a resource for ideas to CASE (Copy and Share Everything!) with your current stash.

Of course, the Annual Catalogue is also current till June 2023, so you will always have goodies to browse :)


Friday, December 31, 2021

Merry Christmas and a Happy New Year!

 I can't believe how fast 2021 went, even though it dragged in parts, mainly during lockdowns and restrictions. In spite of everything that went wrong, I was able to think back this New Year's Eve and reflect on the many blessings that also happened. 

There were major things like selling our old home and moving into a new one. There were important things like making new friends and continuing to develop friendships, being able to craft, learning new things. 

We always had food on the table and petrol in the car, and we were able to take a few local trips.

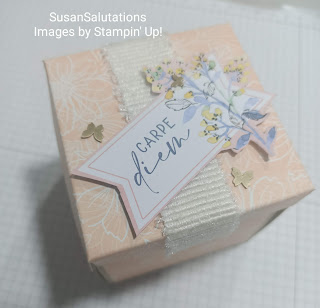
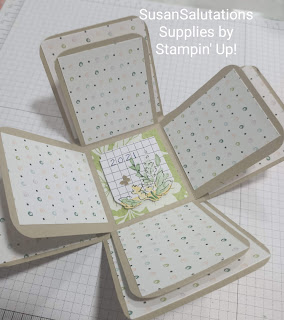
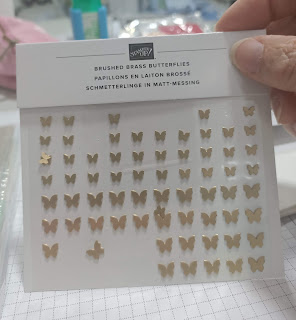
So this New Year's Eve, I decided to make an Exploding Box Album to hold some of the precious memories of 2021. If you would like to make one too, find out how here. I wrote you some instructions. And I have included information about the new supplies I used. The ribbon is the new Frayed Ribbon in white. 

May 2022 be good to us all! 

Explosion Box Album

Explosion Box Album


Tuesday, November 16, 2021

Urgent: November Seasonal Sale

 This great Stampin' Up! sale is on now, but only till November 18th while stocks last! And this sale is for Aussie crafters only, sorry.


Promotion Period: 16–18 November 2021

  • The sale will run for three days only.
  • The discount includes 10% off cardstock, 15% off ink pads (excluding ink pad bundles and third-party pads), and 20% off dies.
  • The discount applies to products featured in the 2021–2022 Annual Catalogue only. Products from the July–December 2021 Mini Catalogue are not included.
  • The sale is available through both online store purchases and demonstrator orders.
  • Please note that items available vary by market based on shipping constraints and product availability.


Shop at SusanSalutations online store. 

Stampin' Up! Dies


Sunday, May 09, 2021

Happy Mother's Day!

To all the Mums out there,  I hope that you have a fabulous Mother's Day. I hope you can honour and spoil your own mother if able and that your day makes you all feel special.

There are so many beautiful hearts and flowers options in the Stampin' Up! range if you need to make a last minute card.  Garden Wishes comes to mind right away:

 
Then there's the heart stamps. The Lots of Heart stamp set makes some lovely appreciation gifts and cards such as shown in these samples, but use your imagination to make your projects your own.


Lots of Heart stamp set

 If you want classically beautiful flowers, the Prized Peony stamp set is perfect. Here are some more cards samples using the Peony stamps:

Prized Peony projects


However you celebrate today, I hope it is a good day

Till next time.


Tuesday, March 02, 2021

How Do I Use Gilded Leafing?

 Many have asked me how to use Gilded Leafing. It's such a pretty embellishment! And it isn't too hard to use.

It comes in a large jar like this.

Gilded Leafing

See that plastic container at the bottom left? You need one of those (I use a deeper one) to hold the gold leaf while you work with it.

Be careful once you let it out of the jar! It is light as a feather and easy to cause it to puff into the air! I turn off all fans and close the windows when I am working with it. This is a time even a face mask could be useful! It will stop you accidentally puffing air towards the light, thin leaf and then finding it all over your desk and clothing!

The next thing I use to affix gold leaf is my Tombow Multipurpose liquid glue. I add a thin film of the glue to the part of an image I want to gild and put it aside to dry. Tombow Multi dries tacky! It's perfect for adding some gilded leaf to your projects.

You can even draw wiggly lines like this, allow them to dry, and gild them. Try dots, add some glue to the middle of a flower image, or to the windows of a stamped house. Add some to a reindeer image's antlers! The possibilities are endless.


Tombow Multipurpose Adhesive


The next thing you need is some kind of brush with stiff bristles. I use one like this. I bought it at a grocery store in the stationery section. You could even use an inexpensive child's paintbrush set. It is a perfect tool for brushing away excess gold leafing.


Paint Brush

So once you have your tacky image all set to go, put a little gold leaf into your large container, and press your tacky image into the gold leaf. It will pick up lots of fluffy bits! Then bring in your stiff brush and brush away the excess, making sure the excess your brush off  falls back into your large container.

For the project I am showcasing here, I dry embossed my cardstock then swiped Tombow across some of the raised parts, allowed it to dry, then pressed the gilded leafing into the tackiness. I brushed away the excess and voila!  A finished, embellished piece!


Gilded Leafing


Be sure to use the same stiff brush to help to carefully put the excess Gilded Leafing back into its jar.

Other ways to Use Gilded Leafing:

You can also use Heat and Stick Powder to gild stamped images. Stamp in Versamark first. Quickly pour Heat & Stick Powder on top. Tap away the excess (as thought you are going to heat emboss the image).

Now use a heat tool to quickly heat the Heat & Stick powder. The trick here is not to heat it too long. Your image will then be tacky enough to pick up the Gold Leafing.

You can use double sided tape to create lines of gilded leafing on your projects. Just lay some tape down on your project, take off the covering paper, and press it into the gold leafing. You could create just straight lines or criss-cross lines of tape across your project to create a pattern.

I'll add a few more images once I have photographed my projects to show you what I mean.


Here are links to the products I used while using gilded leafing:

Gilded Leafing 

Multi Purpose Liquid Glue 

Versamark Pad

Heat Tool

Heat & Stick Powder


Ask questions about how to use these products in comments and I will get back to you. :)


Thursday, February 18, 2021

Gilded Leafing as an Embellishment

 
Gilded leafing is a popular technique this year and I just had to try playing with it! 
 
This card has an embossed panel in the background and I chose to use the gilded leafing on that. 

When you get these gold flakes, they come in a large jar. When you open that jar, be careful! The leafing is light and airy and can be puffed away by the smallest breath.

I turned off my fan and had a large plastic container ready before I opened mine. I also had a stiff paintbrush at the ready.

Once I embossed my cardstock, I brushed some Tombow glue across the raised ridges and set it aside to allow the glue to become tacky dry.

Then I carefully piled gold leaf on top of the glue. Once it had caught, I brushed the excess away with my stiff paintbrush.

It really is a pretty effect!
 
Shop for supplies used to make this project:


Stitched So Sweetly Dies 151690

Dandy Garden 6" x 6" DSP  154297


Gilded leafing detail


Sunday, February 14, 2021

Happy Valentine's Day!

 I whipped this card up for me husband yesterday. I think he appreciated it! As promised, I used the same stamp set I used for Galentine's Day to make it.


What do you think?


I used an ink pad to drag across the embossed card front to highlight the rides in the Old Paper impressions. I used Petal Pink to do that. Since hubby and I have been married for a couple of decades now, I htought Old Paper suitable for my purpose! Lol!

I hope you enjoyed Galentine's Day, Valentine's Day or both.


Saturday, February 13, 2021

Happy Galentine's Day!

 That's not a typo! Today is Galentine's Day and I have a stamp set to prove it! Lol! It's a day started around 2010 in the US after a TV show named an episode after the celebration of gal pals. It's a day to let your girlfriends know you appreciate them and all they do! Have a party, phone them, send a card. I made sure to make a heap of these little cards so I could wish my church friends a happy day.

Galentine's Day happens on February 14th, the day before Valentine's Day. I think is is a great way to make those who aren't in a relationship, are widowed or divorced, special as well. Valentine's Day can be a bad day for them, so why not take the opportunity to turn it around for them a little?

Here are the supplies I used to make my little Galentine's Day cards. 


I think I have an idea for my husband's Valentine using this set as well. I'll come back tomorrow and show you if it works out :)

Happy Galentine's Day!

#galentinesday

Saturday, November 21, 2020

Online Extravaganza - 10% off selected items for 24 hours only on 24th November 2020

 If you have had your eye on something lovely from the Annual Stampin' Up! Catalogue, be sure to order on Tuesday 24th November to save 10%!


 I wanted to let you know now so you have time to plan. There are some exclusions to the 10% off, so I am showing you those here:


There's still so much more available! If you do order, please do use host code

UQ2N9Y3M  and choose me, Susan Hurley-Luke, as your Demonstrator. It might be time to stock up on some supplies for Christmas/New Year crafting, or even gift someone else with some Stampin' Up! goodness. I think our kits are beautiful gifts, for example. They have just about everything you need to make beautiful cards and more.

Happy shopping!


Susan


Thursday, October 08, 2020

Designer Series Paper Sale 1st to 31st October while supplies last!


Do you love Designer Series Paper? I do! If you want a bargain on so many dsp packs from Stampin' Up!, be sure to check out the October sale in my SusanSalutations store! 

Be sure to shop with me, Susan Hurley-Luke.

I hope you get something nice!


Thursday, July 16, 2020

Sailing Home with Embossing Paste - a masculine card

There was a new challenge form Sara Douglass, the Stampin' Up! CEO this week. (Yes! She is a crafter too!) She challenged all who love Stampin' Up! to use some stencils and embossing paste this week, and I decided I would answer her call!

So I broke out my (retired) silver embossing paste and a plastic spoon as a tool for spreading it (I couldn't find my palette knives!), found a stencil and some water colour paper, and got to work.

First I washed down my watercolour paper with water from a Water Painter. Then a dropped a couple of drops of Balmy Blue reinker on the paper and washed that around with my Water Painter as a background.

That had to dry before I used my embossing paste so I speeded the drying time along with my heat tool.

Next I laid my stencil down on my silicone craft mat and smooshed some embossing paste over the top. You can get these palette knives to handle the paste. Just remember to have a flattish container with nice, warm, soapy water handy to put your stencils and tools into after you finish smooshing. Embossing paste dries hard very quickly. I also popped my Silicone Craft sheet in ti be cleaned.

While the paste was drying, I prepared some stamped anchors and seaweed, and I heat embossed one anchor in silver. I got my sentiment tag ready too. And I found some retired Designer Series Paper to decorate my Smokey Slate card base inside and out, and got that ready.

I added some retired Baker's Twine to my anchors and then arranged the elements on my card front.

If you emboss with a stencil and paste, you can add a lot of texture and interest to your papercrafting projects
My watercoloured, embossing pasted background with the Sailing Home elements on top


You can get several stencil designs for your papercraft projects from Stampin' Up!

Once I was happy with their placement, I adhered everything down, then added this layer to my decorated, fun fold card base.

The finished masculine card with a watercoloured, embossed background.

Don't forget to decorate the inside of your card!

I decorated the inside of my masculine card with designer series paper and stamping

Have you tried embossing paste yet? You can now get White (141979) and Shimmery White (145645) embossing paste and can change the colour of both with a few drops of reinker, so you can have nearly 50 colours!

Here are some of the other supplies I used in this project:

Sailing Home stamp set

Smooth Sailing dies 

The stencil I used is retired. Current stencils are available.

Palette Knives

Silicone Craft Sheet

Water Painters 

Fluid 100 Watercolour Paper

Heat Tool


Wednesday, July 08, 2020

Blossoms In Bloom!

This week I have been creating with the Blossoms in Bloom stamp set and dies (Bundle item number 154123). What a great bundle this is! The big, beautiful main stamp and die really caught my eye. I have linked all the products I used so you can find them in my SusanSalutations online store. I just know you will want to recreate these cards or explore some ideas of your own!

First I started playing with the dies. The main die fills a whole card front! I could cut the die cut in half and make two cards! Woo hoo!

I used one of my Water Painters to water paint different ink colours on the Shimmery White A4 Cardstock die cut and let them dry before I cut the die cut in half.

All it took was some Basic Black cardstock, some Gold Foil sheet and some Gold Stampin' Emboss powder with a few Gilded Gems to create this card. I mounted it on a Pretty Peacock cardstock base.


Many Layered Blossoms dies

Here's a closeup of the water painted blossoms on black:

Many Layered Blossoms Dies

Then I wondered what the second half of the die would look like when glued to a thick Whisper White cardstock base, I was not disappointed!

Many Layered Blossoms dies

It was so fresh looking! I added a few sprinkle images to complete the look. And some more Gilded Gems.

Many Layered Blossoms dies

I embellished my envelopes with blooms from my Floral Essence stamp set.

Then I turned to the stamp set. Wow, I loved the stamps too! Here's a couple of samples of the stamped blossoms. I used the whole stamp for these cards. You could just colour some of the blooms with Stampin' Write Markers if you wanted a partial image of course.

This first card is stamped in Bumblebee ink and the centres are stamped in Cinnamon Cider. The leaves are stamped in Mint Macaron. I mounted the Whisper White cardstock layer on Just Jade cardstock and finished with some Just Jade ribbon and some Rhinestone Basic Jewels.

Blossoms in Bloom stamp set

The next card is the same except for the colours of ink and cardstock. I stamped the petals in Magenta Madness and the centres in Bumblebee. The leaves are again Mint Macaron ink. I added some gems and this time I used some Misty Moonlight cardstock and some Misty Moonlight ribbon.

Blossoms in Bloom stamp set

When I embellished the envelopes, I used the smaller blooms and leaves from the Blossoms in Bloom stamp set.

These cards were quick and easy to make! I love that I could sit down and make a couple of cards in each design. When I make cards, I like to make a couple at a time. I figure I might as well do that since I have all my supplies out for one project anyway.

I hope you enjoyed seeing my projects today.

Oooh wait!, I just realised I have not made any cards with the dies and stamps together on one card! And the size of the blooms stamps and dies really are wonderful for scrapbook pages! What would they look like if I cut a die shape with foil? Or vellum? Or if I heat embossed the stamped blossoms? Or layered them? Or.....

Right, back to the craft room. Lol!

Here's how to order the bundle or the individual stamp set or dies from my store. Leave me a comment if you order and a link to your own project using these dies so I can see!


If you just want the Blossoms in Bloom stamp set, here it is
If you just want the Many Layered Blossoms dies, here they are
If you want the Blossoms in Bloom bundle, this is the page.

Enjoy your stampin' day.