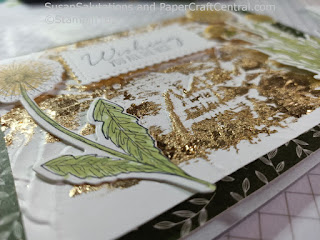
Many have asked me how to use Gilded Leafing. It's such a pretty embellishment! And it isn't too hard to use.
It comes in a large jar like this.
See that plastic container at the bottom left? You need one of those (I use a deeper one) to hold the gold leaf while you work with it.
Be careful once you let it out of the jar! It is light as a feather and easy to cause it to puff into the air! I turn off all fans and close the windows when I am working with it. This is a time even a face mask could be useful! It will stop you accidentally puffing air towards the light, thin leaf and then finding it all over your desk and clothing!
The next thing I use to affix gold leaf is my Tombow Multipurpose liquid glue. I add a thin film of the glue to the part of an image I want to gild and put it aside to dry. Tombow Multi dries tacky! It's perfect for adding some gilded leaf to your projects.
You can even draw wiggly lines like this, allow them to dry, and gild them. Try dots, add some glue to the middle of a flower image, or to the windows of a stamped house. Add some to a reindeer image's antlers! The possibilities are endless.
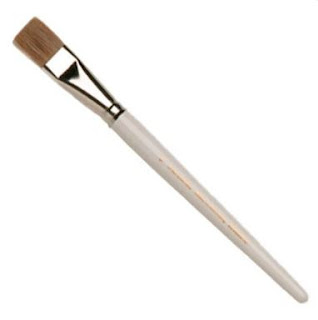
The next thing you need is some kind of brush with stiff bristles. I use one like this. I bought it at a grocery store in the stationery section. You could even use an inexpensive child's paintbrush set. It is a perfect tool for brushing away excess gold leafing.
So once you have your tacky image all set to go, put a little gold leaf into your large container, and press your tacky image into the gold leaf. It will pick up lots of fluffy bits! Then bring in your stiff brush and brush away the excess, making sure the excess your brush off falls back into your large container.
For the project I am showcasing here, I dry embossed my cardstock then swiped Tombow across some of the raised parts, allowed it to dry, then pressed the gilded leafing into the tackiness. I brushed away the excess and voila! A finished, embellished piece!
Be sure to use the same stiff brush to help to carefully put the excess Gilded Leafing back into its jar.
Other ways to Use Gilded Leafing:
You can also use Heat and Stick Powder to gild stamped images. Stamp in Versamark first. Quickly pour Heat & Stick Powder on top. Tap away the excess (as thought you are going to heat emboss the image).
Now use a heat tool to quickly heat the Heat & Stick powder. The trick here is not to heat it too long. Your image will then be tacky enough to pick up the Gold Leafing.
You can use double sided tape to create lines of gilded leafing on your projects. Just lay some tape down on your project, take off the covering paper, and press it into the gold leafing. You could create just straight lines or criss-cross lines of tape across your project to create a pattern.
I'll add a few more images once I have photographed my projects to show you what I mean.
Here are links to the products I used while using gilded leafing:
Gilded Leafing
Multi Purpose Liquid Glue
Versamark Pad
Heat Tool
Heat & Stick Powder
Ask questions about how to use these products in comments and I will get back to you. :)


