SusanSalutations

Tuesday, October 28, 2014

Anniversary

It was our 18th wedding anniversary this month and i had an idea for a card using the Lovely as a Tree stamp set. I could not find my Lovely as a Tree stamp set though! In the end I turned my craft room upside down and was finally rewarded with my long lost stamp set. I had put it away very safely them promptly forgotten where it was. Needless to say, it is now in a very visible place in my craft room.

I wanted to make a soft blue card and had the idea of shading the tree with my Stampin' Write markers, then to add light filtering through the tree. That was the idea, anyway. I coloured my image with some different markers (Island Indigo, Old Olive and one other) then lightly spritzed the stamp with water before stamping my image onto Whisper White cardstock. I used my silver pen to add the subbeam. Maybe I should have used gold, for sunlight, but the blue and silver just looked right together so I went with that. Maybe I should have added the light from the light side of the tree too, but this is how it turned out:

 I embossed the front of my card with a striped embossing folder then layered my image on two different colours of cardstock before drawing a double line around it on the Whisper white. I anchored the corners of my top image with Candy Dots. The greeting came from the And Many More stamp set. I rounded two opposite corners of the card with a corner rounder punch. Finally I added some seam binding ribbon to the bottom.

I added special things to the inside of the card, printing off a recent picture of us both and writing him a poem just for him. It was lovely to see his face when he opened his card (I think I even saw a tear, but of course he said he just had something in his eye!)and it is still on display so I know he liked it.

The supplies I named are still current. The unnamed cardstock colours are retired.

Sunday, October 19, 2014

October Craft Class on Saturday

I decided to hold a special Saturday class this month in addition to the one I have next Tuesday so we could make some Christmas projects and allow one or two new people to join in. It was lovely to sit and chat and craft with friends :) Thank you for being here, ladies! You know who you are!

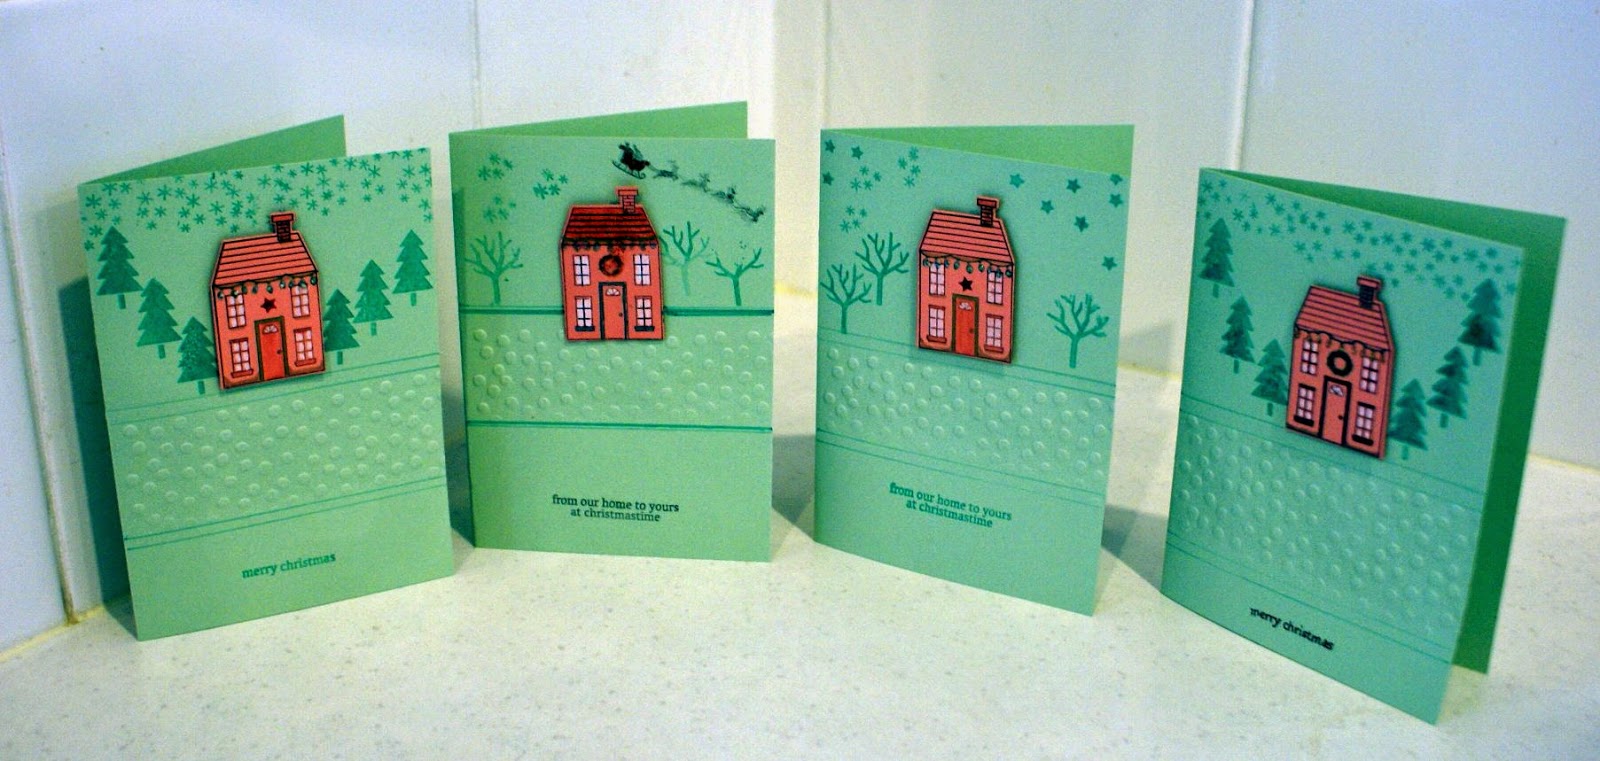
We made two (all Stampin' Up!) projects this time. The first one was a simple Christmas card with cute little houses and imaginative backgrounds. Thanks to Gina K for the embossing sketch idea:


We masked the embossed band area and sprayed it with Shimmer Mist created by adding some retired Stampin' Up! shimmer paint to some Isocol alcohol and shaking it up in a small spray bottle with a fine nozzle.

Cardstock: Pistachio Pudding, Crisp Cantaloupe
Embossing folder: Decorative Dots
Stamps and framelits: Holiday Homes
Markers & inks: Coastal Cabana, Going Gray, White Stampin' Chalk marker, Gold Stampin' Dazzle marker, Garden Green marker
Accessories: Cherry Cobbler Dazzling Details

Next we played with the Curvy Keepsake Box die and various stamps to make some cute treat boxes. I have so many more things to try with this sweet little box shape!

 The Baked Brown Sugar box was stamped with the Dictionary background stamp, inside and out, before placing a stamped Pansy Punch shape inside to be a surprise. (The chocolate covered hearts were not from Stampin' Up!) Some Bermuda Bay thick Baker's twine and some die cut tags in Pistachio Pudding and  Crisp Cantalope finished it off. I think this one would be perfect for your sweetheart on your anniversary :)

I embossed this one with the Pretty Print textured embossing folder (currently on the Clearance Rack in my Stampin' Up! shop) then put pink wrapping paper inside the vellum box to add colour to it. The thick Baker's Twine in Strawberry Slush, double tied, completed the fresh and pretty look.

NOTE: If you are going to emboss vellum cardstock, you might need to use another layer of vellum (a vellum shim) inside your embossing folder to avoid having split vellum. If you get a small split, you can 'repair' it with a little doubles sided adhesive. On the inside, use a piece to repair the split, peel off the backing and remove the stickiness by puffing it up with the Embossing Buddy. It practically disappears! Thanks, Embossing Buddy! :)


This vellum Curvy Keepsake box was stamped in Blackberry Bliss with the Ornamental Pine stamp set. We tied silver ribbon on it and added some more vellum die cut tags stamped in Real Red ink. We also placed a battery operated tea light inside it (also not from Stampin' Up!) Imagine this one gracing your Christmas table settings!

Whew! That was enough fum for one morning! lol! Not really. I went on to add a few more touches to the plans fro our Tuesday class, where more Christmas projects and a mini album will be created.

Stay tuned!

Monday, October 06, 2014

Do you know about my newsletters? And Ninja Turtles!

I just sent out a monthly newsletter to everyone who has requested one. If you are not on my list, why not add your email details? Then you won't miss out on specials and promotions from Stampin' Up! Australia each month.

If you have never requested a newsletter from me before, never fear, I will send you the current one when you add your details :) Just go to SusanSalutations,
click the 'Contact Me' button near the top right side of the page, and fill out your details.

By the way, one of the great monthly specials ends at midnight tonight. so if you need cardstock, inks or other supplies, see if they are on the list of discounted items. It could be that just what you need for your Christmas projects is discounted this month!

I've been stamping. Here's a little something I made in the last week or so for some special grandsons of mine: 

Punch art inspired by another demonstrator, Melissa Banbury from Canada. The only free-hand cut bits were their masks and tongues, but even then I used a circle punch to get even curves on the edges of the masks right. 

I was so pleased that one of my grandsons was actually wearing a Ninja Turtles t-shirt  when I saw him last, so the card hit the spot! Lol!

Supplies:

Cardstock: Daffodil Delight, Marina Mist, Old Olive, Cherry Cobbler, Cajun Craze,  Rich Razzleberry, Night of Navy, Pink Pirouette
Ink: Black Stampin' Write journaling pen, White Stampin' Chalk Marker
Embossing folder: Decorative Dots
Punches: Extra Large oval, 3.5 cm circle
Accessories: Fringe scissors, sponge daubers and ink pads